
We all know how important security is nowadays. Is my data safe? Am I safe using this website? They’re just two of many questions thrown about when it comes to browsing websites. However, surprisingly, a number of websites still do NOT follow the simple practice of securing their website for the users browsing them. Throughout this article I will take you through not only how to set up your SSL certificate, but also how to force your website to use it.
PLEASE NOTE: You will need access to your hosting cPanel to be able complete this tutorial.
Step One: Setting up your SSL Certificate
Setting up your SSL Certificate is simple and quick, and there are two methods in which you can do this. One method is free, the other comes with a yearly cost, your choice depends on your hosting company and also how comfortable you are with using your websites admin panel.
FREE Method – First things first, getting the free SSL certificate entirely depends on who you use for your website hosting. For example, if you use GoDaddy, great! This method will work for you, but using someone like Hostinger, it will not (however, Hostinger offer a very cheap alternative).
OK, so let’s get started – head over to SSL for Free, you can do this via Google or simply click on the link provided on this article. You’ll see a page that looks like this:
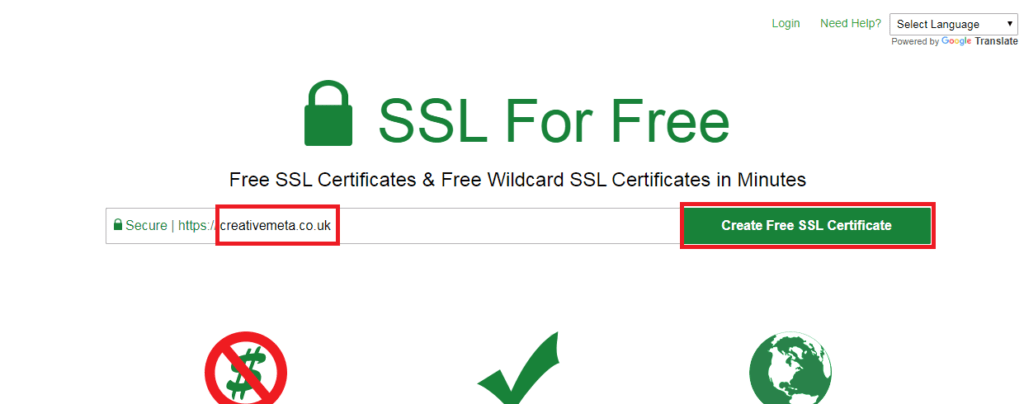
Simply enter the domain name you wish to create an SSL certificate for, and then click the create button next to it. You’ll see a loading screen for roughly 10 seconds, before you see a new page with three options for you to pick from. This is so that we can validate the SSL certificate with your site:

As you can see from the image above, we will be using the ‘Manual Verification’ option to complete our verification. Click the option and you will get an initial failure notification. Don’t be alarmed by this, this is all part of the process. Upon the failure, it will supply you with a file (or 2) that you need to upload to your website hosting. They will have a completely random file name full of different characters and numbers, make sure you download the file(s).
Once you’ve completed this, you need to upload the files onto your websites directory, log into your cPanel and load up your file structure. You will see a file labeled as public_html, open it. Here you will see numerous other files, you do not need to worry about these, as we’re now going to create some new ones.
1 – Create a folder and name it ‘.well-known’
2- Within ‘.well-known’ create another folder and name it ‘acme-challenge’
3- Within ‘acme-challenge’ upload the file(s) that you’ve just downloaded
With this completed, click the retry validation button on SSL For Free and after about 1 minute the process should succeed. You’ll then be redirected to a new page which will have three boxes.:
A Certificate (CRT)
Private Key (KEY)
Certificate Authority Bundle (CABUNDLE)
Each will contain a mass of numbers and letters, in both lower and uppercase, each of these will be unique to your website. Head back-over to your cPanel and look for an option that says SSL/TLS:
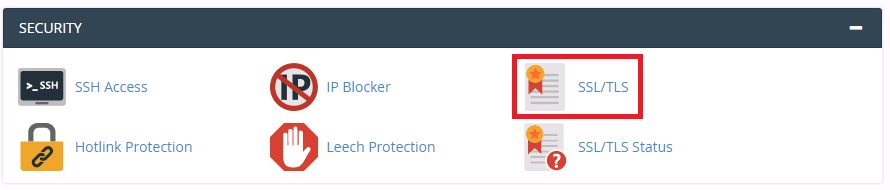
Click it! This will open up another page with four options:
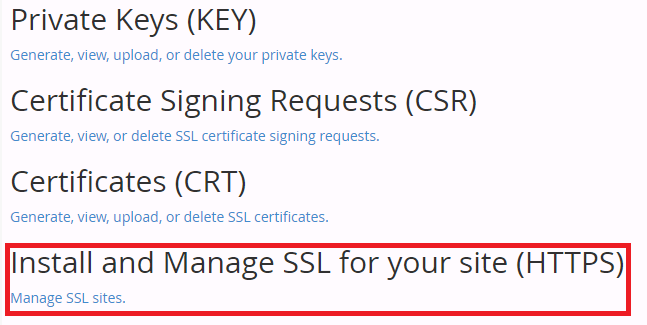
Select the option ‘Install and Manage SSL for your site (HTTPS). This will open up another page and you will see there are three sections in which you need to add your CRT, KEY and CABUNDLE and also an option to select a domain.
Select your domain name from the drop-down list and then copy and paste all three of your codes into their relative spaces, then click INSTALL CERTIFICATE. After a few seconds this should succeed. Your website now has a valid SSL certificate that it can use, great! Now we move onto Step Two, where we will force users of your website to access the site using https, and not http.
Step Two: Forcing users to use HTTPS
This is the second and final step in the process. To complete this final step it will require you to access and edit a file called .htaccess. This file is used for server configuration, and should only be changed if you’re confident in doing so.
Before starting this step, please backup and download your original .htaccess file, this will make it very easy to revert any changes you’ve made if necessary.
Head back over to your cPanel and open up your file structure again. As before, open the folder called public_html and it will display all of the files related to your website. Within this, there should be a file called .htaccess. If you don’t see one, this could be down to one of two reasons:
- The file is hidden, so simply select to show hidden files in the settings
- The file doesn’t exist, so simply create a filer and name it .htaccess
Once you’ve found the correct file, right click it and click edit (a warning message might appear, but don’t worry about this, click continue). You’ll now need to add a small bit of code to this file:
RewriteEngine On

RewriteCond %{HTTPS} off
RewriteRule ^(.*)$ https://%{HTTP_HOST}/$1 [R=301,L]
So what exactly does the above do? It’s quite simple really.
RewriteEngine On – As it says, this is simply turning on Apaches Rewrite Engine.
RewriteCond %{HTTPS} off – This is condition, and it is checking to see if the website is loading in HTTP or HTTPS. If it is loading in https, then this is the end of the process, however, if it is http, it will continue onto the final rule.
RewriteRule ^(.*)$ https://%{HTTP_HOST}/$1 [R=301,L] – This is the final stage, and is what will make your website use the SSL certificate you setup earlier. Any time a request to the server is made as http, it will change it to https.
Now add the code to your file (ideally at the top) and click save.
That is it! If you’ve followed these steps correctly, your website will now successfully use https instead of http.


